GIT integration for TM1, part 1

I finally had a couple of days to play with Git integration for TM1, something I was very curious about ever since it was released in PA 2.0.7. This post describes what I’ve found so far plus the instructions on setting it up in VSCode. I hope to post more on this later.
There’s not a lot of information on the topic so far, apart from the very detailed, but quite confusing IBM documentation (unless you’re into reading standards) and a really good post by Rahul on TM1UP. I encourage you to read both.
Overview
Just to get it out of the way, Git is the most popular code version control system at the moment. Most notable hosting providers are GitHub, GitLab and Atlassian Bitbucket. And you can, of course, roll out your own internal Git server.
Let’s start with some simple use cases for Git in TM1:
- code versioning: wouldn’t it be nice to see who changed this rule or process last and maybe even why
- code promotion: maybe we’d get past the “drop the files in the folder and restart” within my lifetime?
- code comparison: would be great to see what’s different between development and production right now?
TLDR conclusions so far
- All this feels quite tech-heavy and whilst I’m a big fan, I’m not so sure that everyone will be. Really appealing to ‘developer’ crowd, but for ‘finance’?
- you’d need to build some robust internal processes to use git cause there’s nothing stopping you to ‘go around’ it especially when the fires start burning
- this integration introduces a new layer of potential errors, for example I had issues with one of the subsets in Planning Sample server that had commas in it’s name, Git push worked, but Pull wouldn’t :) I’m also not sure how well it’ll work on relatively large models (json’s for million elements dimension would make it quite slow IMHO)
- looks like it is very applicable for the ‘enterprisey’ part of the TM1 rollouts, especially if you have dev / ops teams separation
- I am going to set this up in a couple of my projects and see how it goes in real world
TM1 model code definition includes the following by default, all exported in human-readable and editable json:
  * cubes:
      * dimension structure
      * rules
      * pickilist / drill through rules
      * views
  * dimensions:
      * all dimension elements & hierachies
      * subsets
  * processes
I still have no idea on how to use tm1project resource definition despite spending literally a day trying different syntax options which tells you a lot about how sharp I am how good the documentation is. It should be very useful for describing deployment requirements, for example, to run a process XYZ after deploying these changes or for making the model more manageable, for example, to ignore all large & auto-updated dimensions from code base or code deploy (ignore customers dimension, but do include version dimension).
But I still haven’t got a clue how to use it properly, I’ll keep digging.
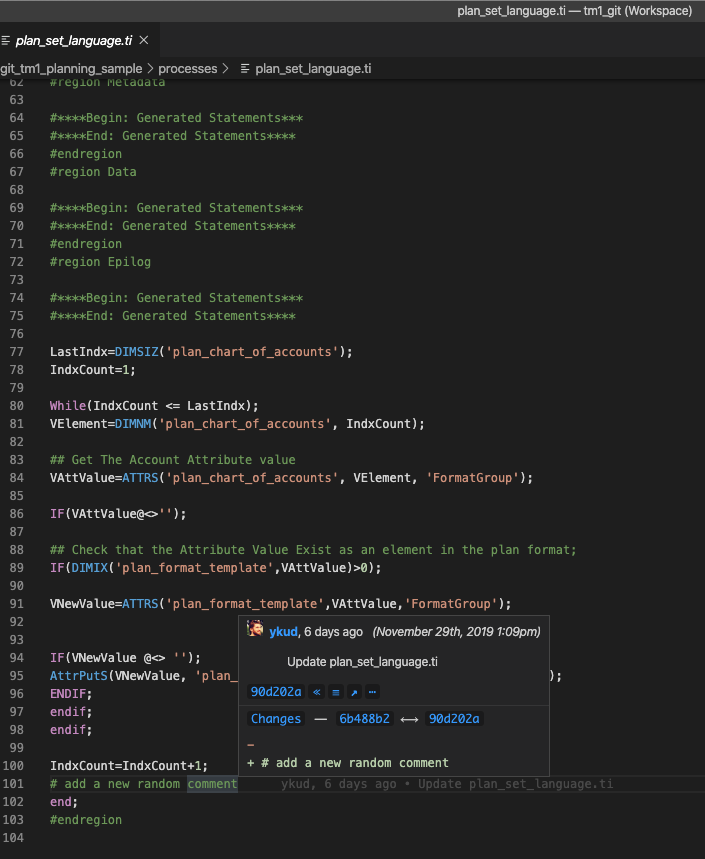
Also, I was recently introduced to GitLens and having it on some of the large rules and TIs would be so good. Imagine seeing who changed this line last, like this:
How a Git-enabled workflow in TM1 could work?
Some of Git terminology (read this for the proper introduction), I’m bastardising adapting it for TM1 purposes.
- code repository — here’s where we store tm1 model code. Most likely you’d need a repository for each TM1 model (but use the same repository for dev / prod / test deployments)
- pulling code — taking code from your repository and ‘pulling’ it to a TM1 server
- pushing code — taking code from your TM1 model and ‘pushing’ it to code repository
- repository branch — this is a powerfull concept of creating a separate version/view of the whole repository to work on a set of changes that should be isolated from others. There are many ways you could do branching for Tm1 models, but at the moment “environment branching”, i.e. having a branch per environment + branches for any significant area of changes would be my go-to approach (and maybe a default bug-fix branch).
- merging code branches — combining the changes between branches into a new ‘merged’ code base. This usually involves reviewing the list of added/deleted files and reviewing the changes between the files that are different in branches.
In a simple world it looks like this:
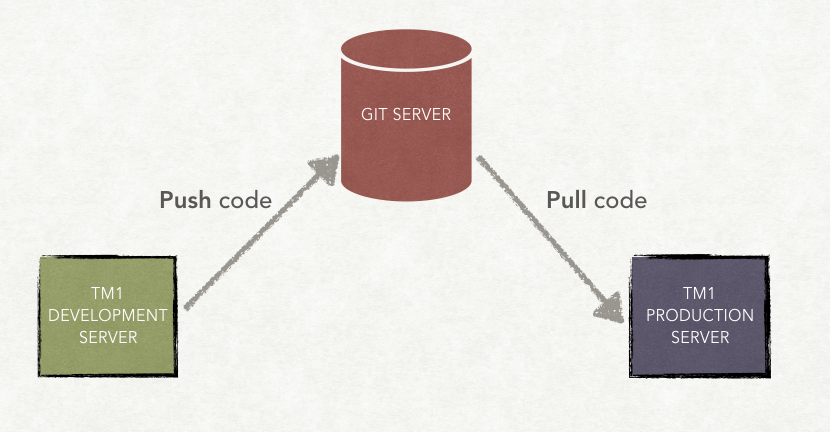
So in my current thinking if you have 3 tm1 environments (dev / test / prod):
- your repository would have 3 branches (dev / test / prod) accordingly
- you either develop your code in Git-aware fashion in a ‘branch’ dedicated to what you’re doing (new feature / bug fix / etc) or just the same way you develop your TM1 code now, be it Architect, PAW or Notepad++
- once you’re happy with your development you’d ‘push’ changed code from dev TM1 server to dev branch on Git repo (or you ‘merge’ your new branch into ‘dev’ branch)
- you can use a lot of tools to do Git branch comparison. For example, this is how it looks in GitLens I mentioned above:
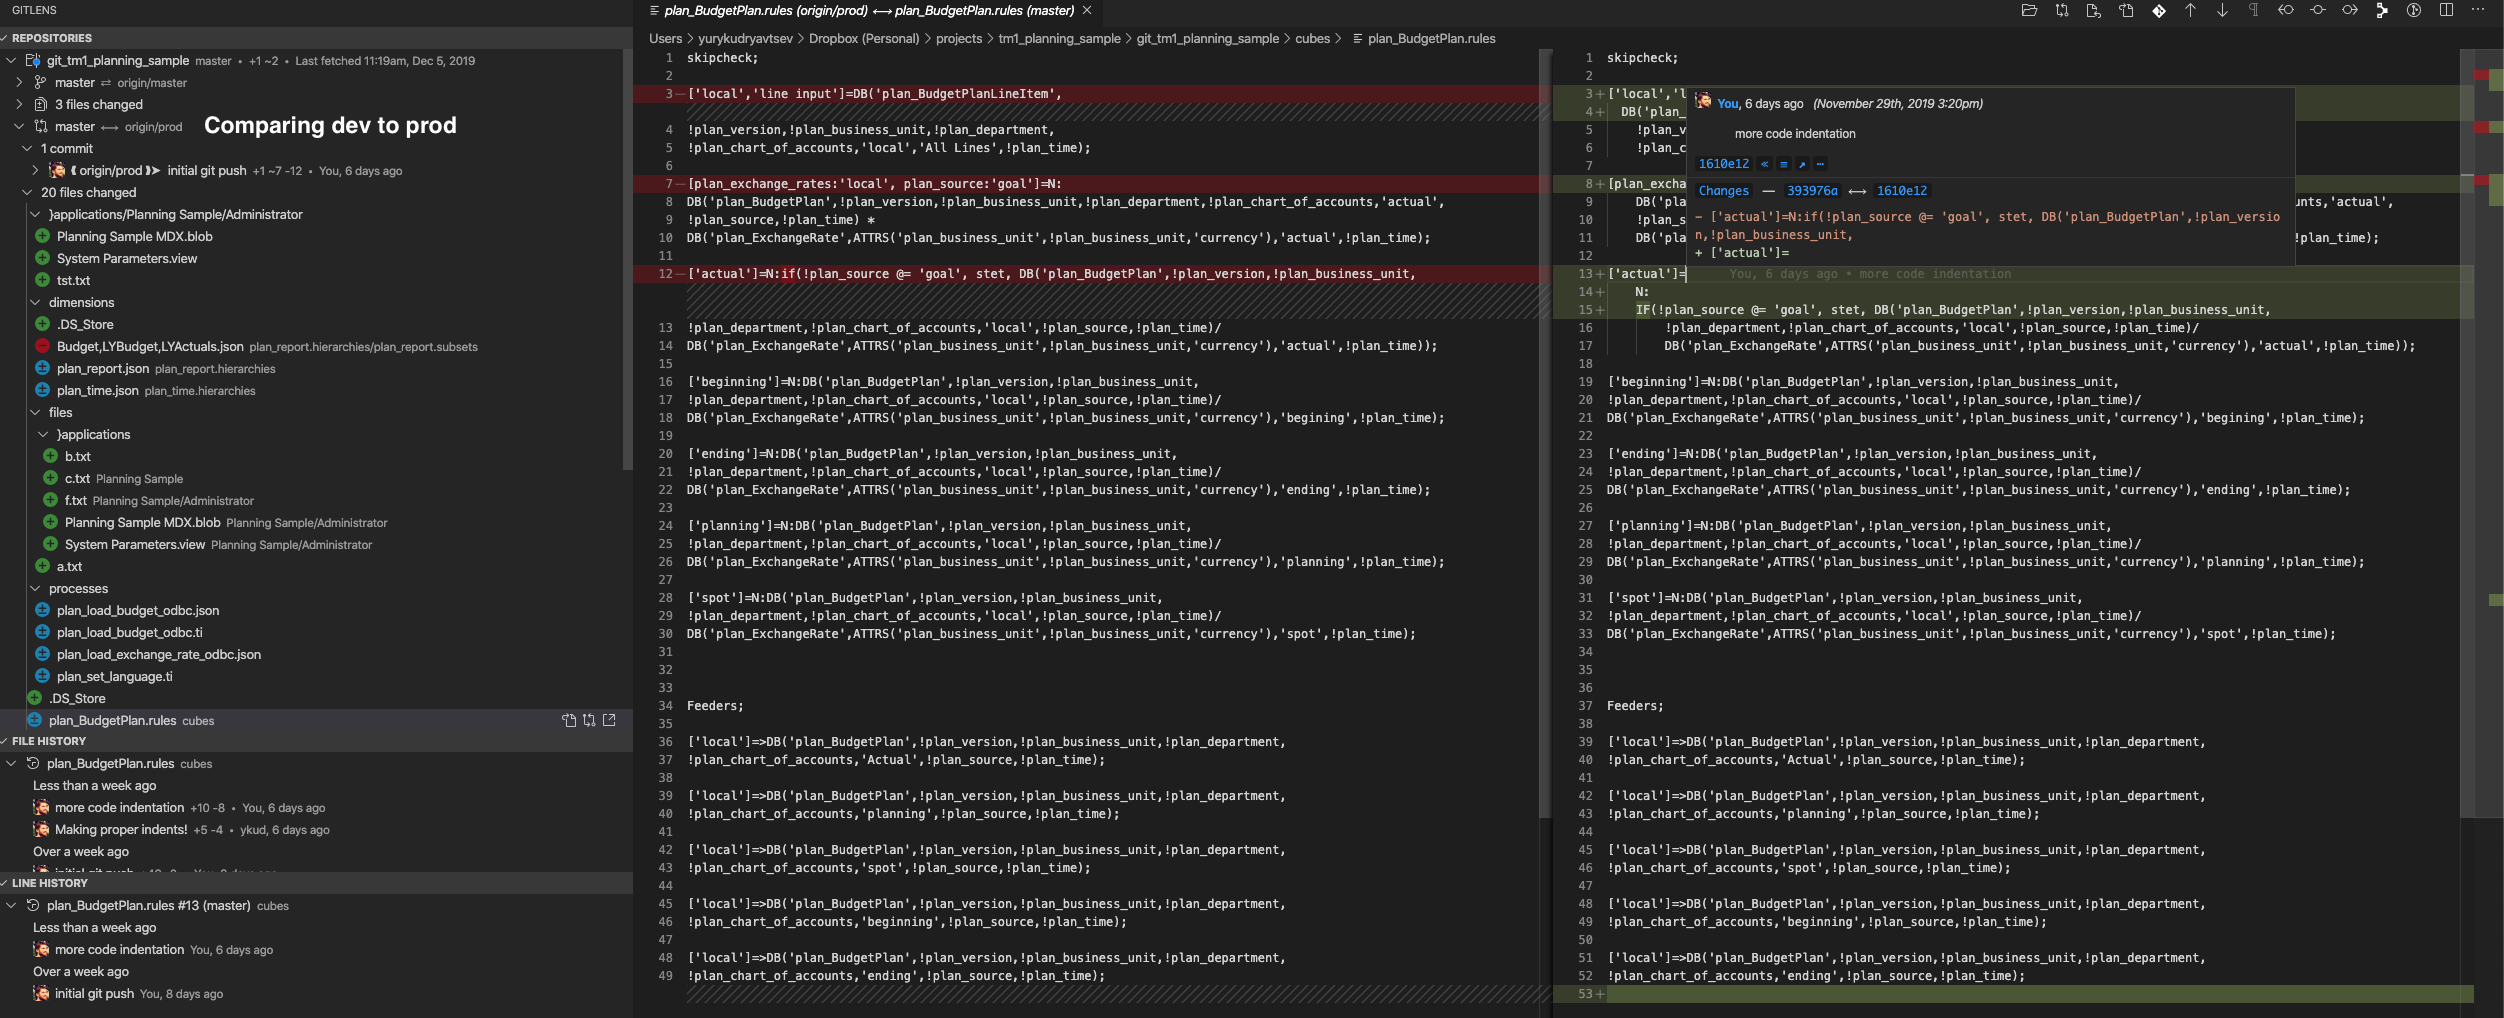 There’s a lot happening here, it shows me all the changed files between branches, the difference in the selected rule file and also the line history of a particular line I’m in the file
 - once you’re happy with your changes you can select the objects you want to deploy from your ‘development’ branch, pull them into a separate ‘feature X or bug Z’ branch (or bypass this if youd had a separate branch all along), ‘merge’ this new branch into ‘test’ branch
- you ‘pull’ the changed ‘test’ branch to TM1 test server and let QA team do their job (or just put on the QA top hat and get on with it). If you need any changes after QA, you do them in dev and repromote the branch or update in test directly, but make sure to ‘push’ test back to Git and integrate changes back to you branch
- once test is complete, you ‘merge’ this branch into ‘prod’ branch and pull ‘prod’ branch into prod server.
Something like this, but with a lot more boxes :)

TM1 Git actions
Connecting Tm1 to Git Repository
Once you’re done, here’s how to connect a TM1 model to Git repository.
- Create a Git Repo on, say, GitHub or BitBucket
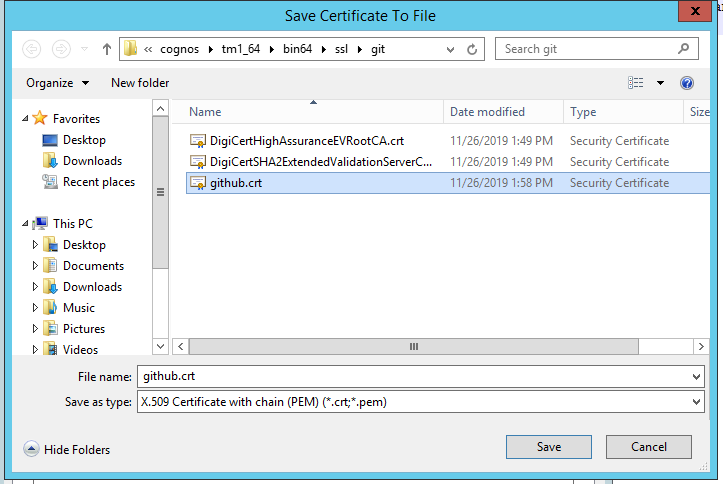
- Import GitHub certs into TM1
- Export the certs from your browser (export the whole tree in one cert)
- and run the following command on TM1 server (note that
-labeland-stashedare mixed in IBM instructions)
gsk8capicmd_64.exe -cert -add -db "C:\Program Files\ibm\cognos\tm1_64\bin64\ssl\ibmtm1.kdb" -file "C:\Program Files\ibm\cognos\tm1_64\bin64\ssl\git\github.crt" -label github -stashed -format ascii -trust enable- You can validate that import was sucessfull via running this command:
gsk8capicmd_64.exe -cert -validate -db "C:\Program Files\ibm\cognos\tm1_64\bin64\ssl\ibmtm1.kdb" -label github -stashed- All should look like this

- Export the certs from your browser (export the whole tree in one cert)
- Restart TM1 server post these changes
- Initialise TM1 against this Git repo via a call like this (I’m running the Rest calls via Rest client in VSCode, see the end of the post for more details).
###
#Git Init
POST {{tm1_url}}/api/v1/GitInit HTTP/1.1
Authorization: Basic {{tm1_user_name}} {{tm1_user_password}}
content-type: application/json

{
"URL": "{{git_repo_url}}",
"Deployment": "dev",
"Username": "{{git_user_name}}",
"Password": "{{git_user_password}}",
"Force": true
}
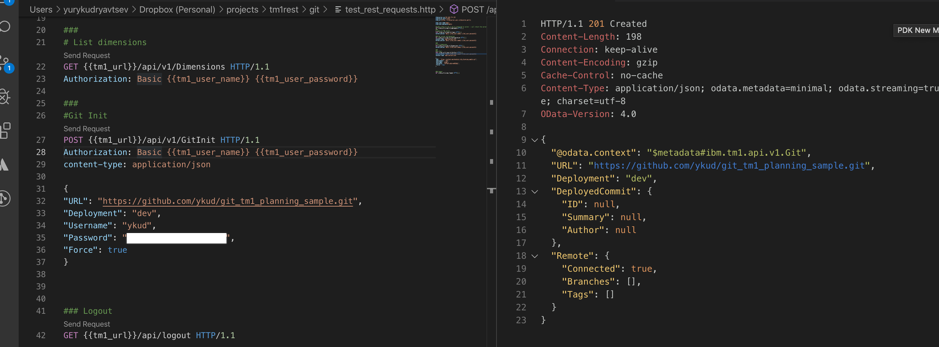
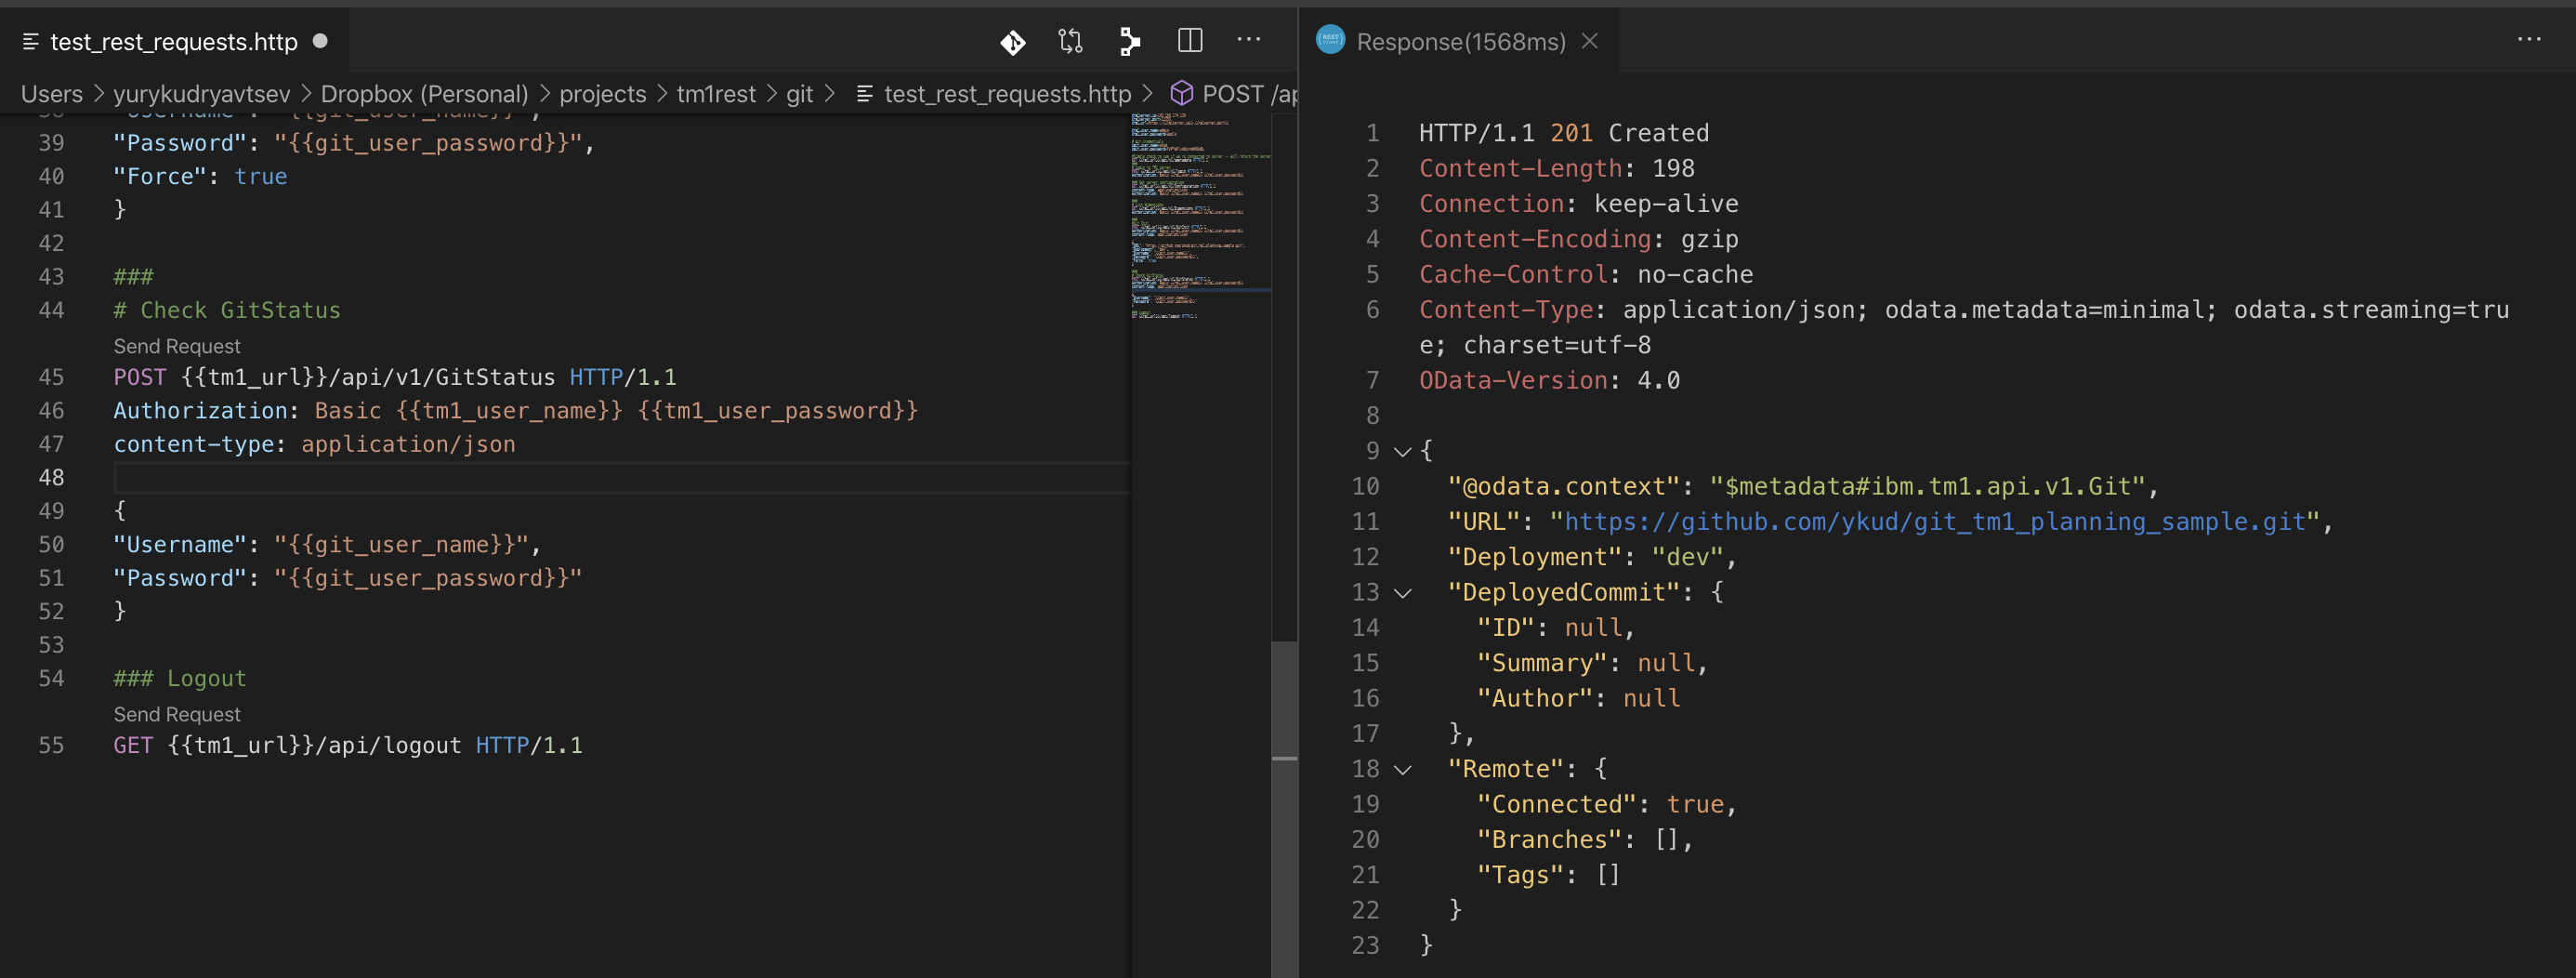
You can check your models Git status via a call like this:
###
# Check GitStatus
POST {{tm1_url}}/api/v1/GitStatus HTTP/1.1
Authorization: Basic {{tm1_user_name}} {{tm1_user_password}}
content-type: application/json

{
"Username": "{{git_user_name}}",
"Password": "{{git_user_password}}"
}
And you can disconnect it from Git via a call like this:
### Detach Git repo
POST {{tm1_url}}/api/v1/GitUninit HTTP/1.1
Authorization: Basic {{tm1_user_name}} {{tm1_user_password}}
content-type: application/json
Pushing code
Push Tm1 model into Git via a Rest call like this. It’s a two-step process:
- you first create a push plan which describes what will be pushed into a branch in repository
###
# Push code to repo -- 1st time the Branch should be empty
# we're defining the 'base' or our code
# Create a push plan that will push the whole model to git
POST {{tm1_url}}/api/v1/GitPush HTTP/1.1
Authorization: Basic {{tm1_user_name}} {{tm1_user_password}}
content-type: application/json

{
  "Branch": "master",
  "NewBranch":"prod",
  "Force": true,
  "Message": "initial git push",
  "Author": "{{git_user_name}}",
  "Email": "{{git_user_email}}",
  "Username": "{{git_user_name}}",
  "Password": "{{git_user_password}}"
}
This call lists what will happen during the push as a response (like files created/updated):
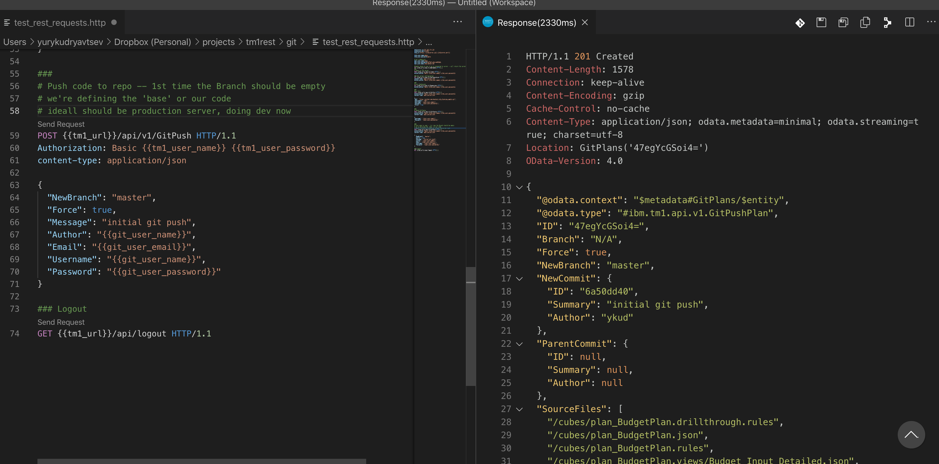 It also returns the Git plan ID in response. This is a chance to review whether these are really the changes we want in repo :)
2. you then execute this plan to really push changes
It also returns the Git plan ID in response. This is a chance to review whether these are really the changes we want in repo :)
2. you then execute this plan to really push changes
@git_push_plan_id=47egYcEyQxY=
### Execute push plan
POST {{tm1_url}}/api/v1/GitPlans('{{git_push_plan_id}}')/tm1.Execute HTTP/1.1
Authorization: Basic {{tm1_user_name}} {{tm1_user_password}}
content-type: application/json

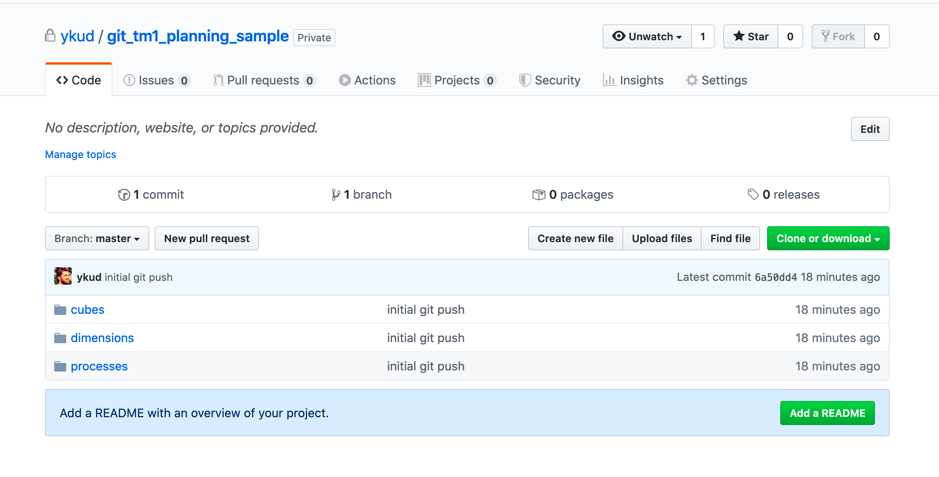
At this point your Git repository will be populated and you’d see the model in all it’s glory:
Pulling code
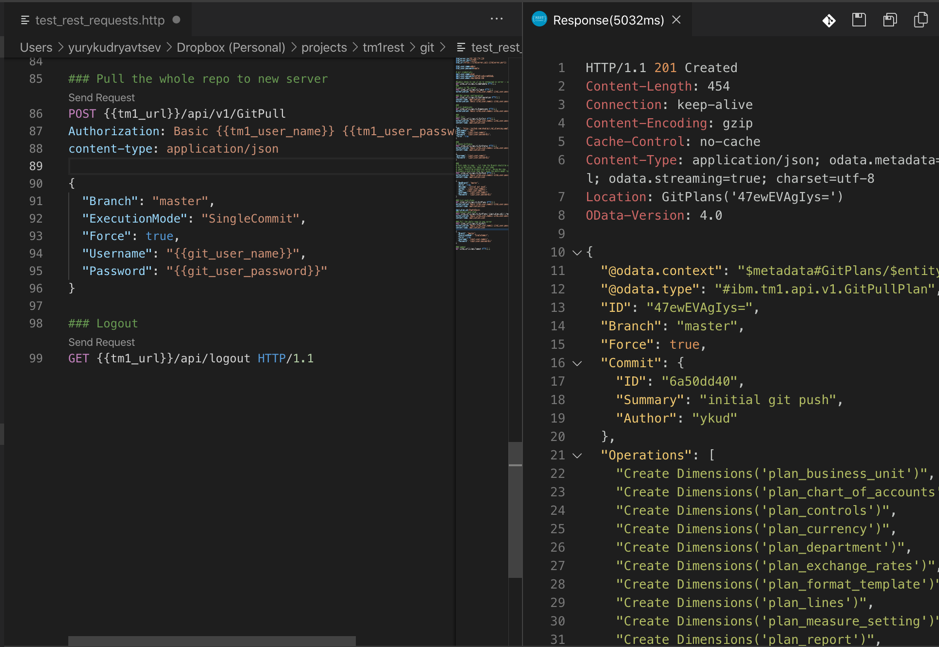
To pull changes from the repository, you create a Pull plan that will list all the changes that will happen with the model once it’s executed (note the branch parameter, this is the one we’d use to pull only specified environment or change set):
### Create pull plan
POST {{tm1_url}}/api/v1/GitPull
Authorization: Basic {{tm1_user_name}} {{tm1_user_password}}
content-type: application/json

{
  "Branch": "master",
  "ExecutionMode": "SingleCommit",
  "Force": true,
  "Username": "{{git_user_name}}",
  "Password": "{{git_user_password}}"
}
A response to this Rest API call gives you preview of what’s changed between the model ‘running’ on your server and the Git repo and how these will be applied. Unfortunately, it doesn’t show you too much detail on the way changes will be applied (i.e. dimension elements added or removed), but you can see all of this by comparing files in Git.
and you execute the plan the same way as the push plans.
### Execute pull plan
POST {{tm1_url}}/api/v1/GitPlans('{{git_pull_plan_id}}')/tm1.Execute HTTP/1.1
Authorization: Basic {{tm1_user_name}} {{tm1_user_password}}
content-type: application/json
You can view the current plans via this call:
### List plans
GET {{tm1_url}}/api/v1/GitPlans HTTP/1.1
Authorization: Basic {{tm1_user_name}} {{tm1_user_password}}
content-type: application/json
How to have the same configuration as in screenshots?
My setup is the following:
- Git itself to pull the repo to local folder and enable local editing
- VSCode — yay for proper IDE
- Rest Client for VSCode — I’m running the parametrised REST API calls based on this template, feel free to grab it here. It’s for native mode security at the moment, I’ll update it for CAM later on.
- GitLens plugin for VSCode to show git history, compare branches and etc – I really, really like it
- CarpeDatums TM1 code completion / highlighting plugin.
Installing all of the above would take you all of half an hour :)
Using Rest Client sample request file
Kinda self explanatory, fill in the paramters in the first 10 lines of the file.
rest-client.timeoutinmilliseconds:0
# TM1 settings
# IP or servername where TM1 server runs
@tm1server_ip=192.168.174.169
# HTTP Port Number in tm1s.cfg
@tm1server_port=12345
@tm1_url=https://{{tm1server_ip}}:{{tm1server_port}}
# Integrated Security 1 credentials
@tm1_user_name=admin
@tm1_user_password=apple`
# git credentials
@git_user_name=
@git_user_password=
@git_user_email=
@git_repo_url=
If you have Rest Client installed in VSCode, you’d have a ‘Send Request’ button underneath each request. Clicking it sends the request :)
